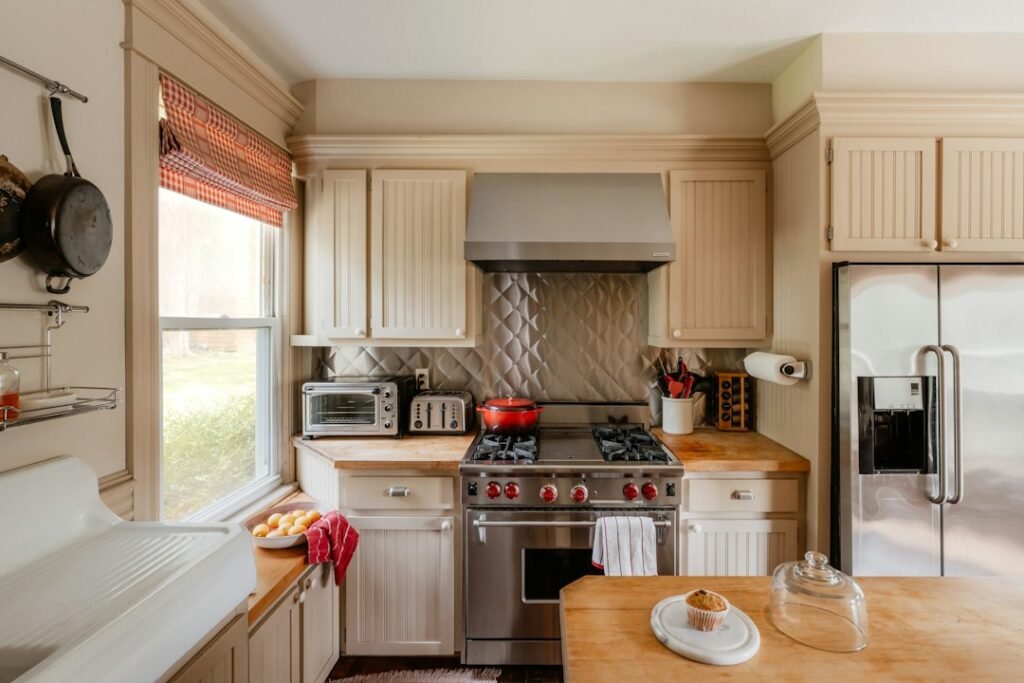
Appliance zones organize a small kitchen by task rather than by product. Group tools for cooking, drinks, food preparation, portable meals, and cleaning near the supplies they use—while protecting a clear preparation area and following every appliance’s placement, outlet, clearance, and safety instructions.
Affiliate disclosure: As an Amazon Associate, we earn from qualifying purchases. Some links on this site may be affiliate links, at no additional cost to you.
A zone is not permission to crowd appliances together or operate them in storage spaces. It is a planning method. The exact model manual, apartment layout, electrical system, ventilation, water exposure, and safe movement always take priority.
Quick appliance-zone plan
- List the tasks performed most often.
- Choose one clear preparation zone.
- Map suitable outlets, sink splash areas, heat, and walkways.
- Group appliances by workflow and frequency.
- Assign storage for accessories and removable parts.
- Test open lids, doors, cords, and loading space.
- Keep hot, wet, sharp, and food-contact tasks appropriately separated.
- Review the arrangement after two weeks of normal use.
1. Map the fixed features first
Draw a simple plan showing the sink, stove, refrigerator, outlets, upper cabinets, doors, drawers, windows, ventilation, and walkways. Mark areas exposed to water, heat, or frequent traffic.
Do not plan an appliance zone where cords must cross the sink or walkway, where steam is trapped beneath cabinets, or where a door collides with an open lid. Follow local requirements, building rules, and the exact appliance instructions.
2. Protect a preparation zone
Reserve one counter section for chopping, measuring, mixing, plating, and unpacking food. Keep this area free from permanent appliance bases unless the remaining surface is genuinely sufficient for safe preparation.
In many small kitchens, a clear working rectangle is more valuable than displaying every appliance. Store weekly and occasional tools elsewhere and bring them out only when needed.
3. Create a cooking zone
The cooking zone may include the stove and a supported countertop cooker. Keep combustible objects, packaging, towels, and loose cords away from heat. Maintain manufacturer-required clearances and ventilation.
Store compatible cookware and frequently used utensils nearby without blocking controls or creating fall hazards. If using portable induction, confirm cookware compatibility, power requirements, and the approved surface. See our countertop appliance safety checklist.
4. Create a drink zone
A drink zone may group a kettle, coffee appliance, blender, cups, and shelf-stable supplies. It should remain away from sink splashes unless the equipment and outlet placement are suitable.
Do not operate several high-power appliances at once merely because they share a zone. Follow circuit, outlet, and product instructions. Store water and ingredients so they do not spill into electrical bases.
If a blender is used only for single drinks, keep its cups and lids together. Our personal versus full-size blender guide can help determine which format belongs in the zone.
5. Create a food-preparation zone
Place cutting boards, bowls, knives, and supported preparation appliances near the clear work surface. Keep processor and blender blades protected when stored, and make sure there is room to assemble and disassemble parts without reaching across heat.
Separate raw-food tasks from ready-to-eat ingredients and clean surfaces appropriately. Do not let an electrical motor base crowd the sink edge.
A mini food processor may suit this zone when its normal batch is small. Compare overlap in our mini food processor versus blender guide.
6. Create a portable-meal zone
Group lunch containers, approved lids, utensils, insulated bags, and an electric lunch box near the area used for packing. Keep vehicle power cords or adapters labeled and separate from household cords.
Do not assume that similar connectors are interchangeable. Match every cord and power source to the exact model. Clean and dry food containers before closed storage.
7. Create a baking or bread zone
Keep flour, measuring tools, recipes, and bread-machine accessories organized near the preparation area, but protect ingredients from heat and moisture. A bread maker needs room for its lid, pan removal, ventilation, and safe handling.
Because bread machines can be heavy and tall, plan both storage and operation. Review how much counter space a bread machine needs before assigning the zone.
8. Create a cleaning and drying zone
Identify where removable bowls, jars, lids, trays, and utensils will be washed and dried. Keep electrical bases out of the sink and follow the manual for every component.
Do not pile sharp blades under dishes or leave them concealed in soapy water. Keep cleaning chemicals separate from food, accessories, and food-contact storage.
The drying zone must not block the safe operation of another appliance. If the rack consumes the only preparation area, consider a schedule or approved compact solution rather than stacking wet parts.
Zone-planning table
| Zone | Typical items | Main check |
|---|---|---|
| Preparation | Boards, bowls, processor, blender | Clear surface and safe blade handling |
| Cooking | Cooker, induction unit, utensils | Heat, clearance, ventilation, outlet |
| Drinks | Kettle, coffee appliance, blender cups | Water control and electrical separation |
| Portable meals | Lunch box, containers, cords | Correct power source and dry storage |
| Baking | Bread maker, measures, ingredients | Operating height and lifting |
| Cleaning | Sink, drying rack, approved parts | Electrical bases and sharp parts |
9. Use frequency to choose counter or cabinet placement
Keep daily tools in safe, convenient positions. Place weekly appliances on accessible shelves. Move occasional appliances to deeper storage only when they can be retrieved without unsafe lifting.
Our appliance storage guide provides a frequency-based system for counters, cabinets, shelves, drawers, and carts.
10. Manage accessories and cords by zone
Give each appliance a labeled location for cups, lids, paddles, blades, trays, and manuals. Avoid a general drawer of unidentified cords. Similar-looking power components may not be compatible.
Do not tightly wind, crush, or pinch cords. Keep plugs dry and inspect them before use. Never route a live cord across a walkway or hot surface.
11. Test the workflow
Walk through one real task without turning the appliance on. Collect ingredients, assemble parts, reach the controls, open the lid, remove the finished food, and move washable parts to the sink.
Notice collisions: a drawer blocked by the appliance, a cabinet hit by the lid, a cord stretched across the work surface, or nowhere to place a hot container. Adjust the zone before routine use.
12. Avoid overcrowded “appliance garages”
An enclosed cabinet may be useful for storage, but do not operate an appliance inside it unless the appliance and installation instructions specifically permit that setup. Heat, steam, ventilation, cord routing, and combustible materials can make an attractive storage solution unsafe for operation.
Move the appliance to its approved operating position and confirm clearance before plugging it in.
A two-week zone review
After arranging zones, observe normal use for two weeks. Record which appliances are moved repeatedly, which cords interfere, where water collects, and which accessories go missing.
Change one problem at a time. A small improvement—moving cups closer to the blender or placing a weekly cooker on a reachable shelf—can be more useful than buying a complete organizer system.
Frequently asked questions
How many appliance zones should a small kitchen have?
Use only as many as the routine needs. Several tasks can share one zone at different times if the surface is cleared and appliances are stored safely.
Can I keep every appliance on the counter?
Only if sufficient preparation space, clearance, electrical access, and safe workflow remain. Most small kitchens benefit from storing less-used appliances.
Should the drink zone be beside the sink?
Convenient water access must be balanced against splash and electrical risk. Choose a dry, manual-compliant position with suitable outlets and cord routing.
Bottom line
Create appliance zones around repeated tasks: preparation, cooking, drinks, portable meals, baking, and cleaning. Protect one clear work area, map fixed hazards and outlets, store by frequency, and test every lid, cord, and movement. A successful small-kitchen zone reduces unnecessary steps without crowding appliances into unsafe positions.
Planning what to buy for those zones? See the small-kitchen appliance buying mistakes to avoid and our guide to building an appliance budget.