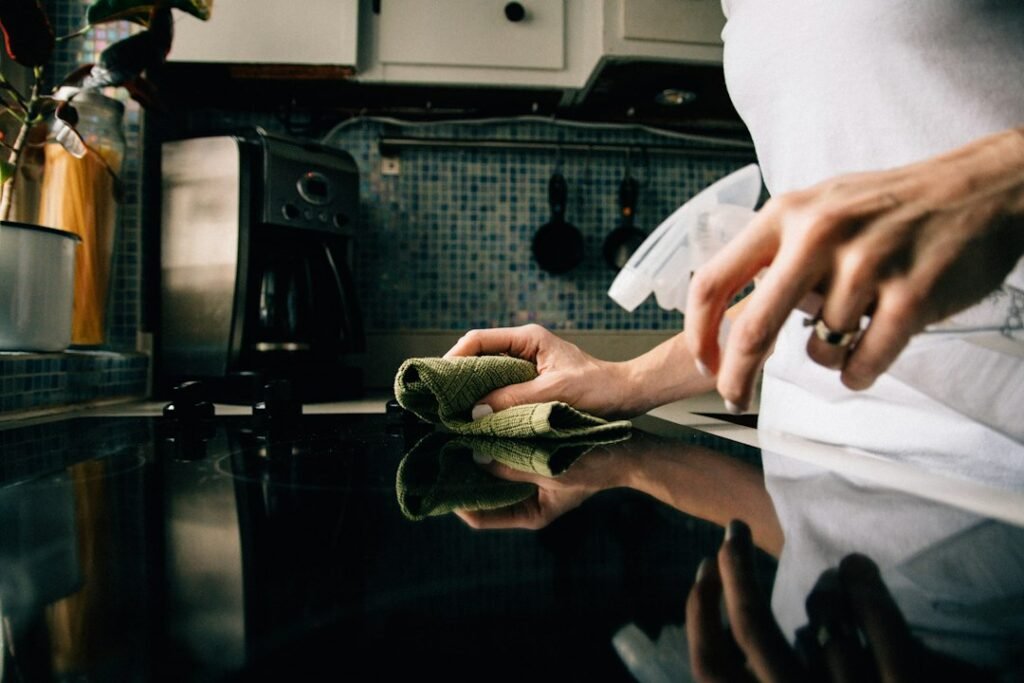
To clean a portable induction cooktop, switch it off, let any normal cooling-fan cycle finish, unplug it, and allow the glass to cool before routine cleaning. Use a soft cloth and the cleaning method approved in your model’s manual. Keep liquid out of vents, seams, controls, and the power connection, then remove cleaner residue and dry the exterior before reconnecting it.
There is one important exception to the ordinary cool-first routine: sugary spills and melted plastic can require special, prompt removal instructions. Check your manufacturer’s directions rather than treating every spill the same way.
This guide is for everyday care in a small kitchen, where a portable burner may share counter space with meal preparation and storage. It is not a hands-on product test or a substitute for your appliance manual.
Affiliate disclosure: As an Amazon Associate, we earn from qualifying purchases. Some shopping links below are affiliate links.
Start with this quick cleaning checklist
- Identify the model and read its cleaning instructions before choosing a cleaner or scraper.
- For routine cleaning, turn off the burner, allow its normal shutdown process, unplug it, and wait for the cooking surface to cool.
- Remove loose crumbs with a clean, soft cloth without pushing them into openings.
- Clean the glass using only the manufacturer-approved method.
- Wipe the outer housing carefully; do not soak the unit or spray its openings.
- Remove cleaner residue, dry the outside, and inspect the glass and cord before the next use.
Do not assume the surface is cool because induction heats the pan directly. A hot pan transfers heat back to the glass. A residual-heat indicator is useful, but it does not replace the precautions in the manual.
What supplies do you actually need?
A small cleaning kit is usually more practical than a cupboard full of products. Start with two clean, soft cloths: one for cleaning and one for drying. Add the cleaner specified for your model, if its instructions require one. A cooktop-approved pad or scraper belongs in the kit only when the manufacturer permits it.
“Safe for glass” is not enough information by itself. Window glass, coated surfaces, printed control panels, and glass-ceramic cooking surfaces do not necessarily share the same care requirements. Check compatibility with the actual appliance, not just the front of the bottle.
Keep this kit separate from rough dishwashing pads. A cloth that looks soft can still carry grit from a countertop or pan. In a compact kitchen, a small labeled pouch helps stop a clean polishing cloth from becoming the cloth used to wipe flour, crumbs, and greasy pans.
Cleaning methods by cooktop area
| Area | Practical approach | Avoid |
|---|---|---|
| Glass cooking surface | Use a clean, soft cloth and the approved glass-surface cleaning method. | Steel wool, gritty pads, and improvised scraping tools. |
| Control panel | Follow the manual; keep wiping controlled and moisture minimal. | Flooding buttons, seams, or touch-control edges. |
| Outer housing | Wipe only as permitted, then dry the exterior. | Immersion, rinsing under a tap, or soaking the base. |
| Air vents | Remove accessible exterior dust using the method allowed by the manual. | Liquid, inserted tools, or opening the housing. |
| Cord and plug | Inspect for damage; keep connections dry. | Cleaning a connected appliance or reconnecting wet parts. |
| Underside of cookware | Clean and dry the pan separately before cooking. | Dragging a dirty or rough pan across the glass. |
How to clean a portable induction cooktop after ordinary cooking
1. Give the appliance space to shut down
Finish cooking and switch the unit off using its controls. Some portable models run a fan afterward. Let the normal cooling process happen as described in the manual before unplugging for cleaning. Move the pan to a suitable heat-safe location if necessary, without carrying it over an exposed cord or crowded workspace.
Do not immediately slide the cooktop into a drawer or cupboard. Plan your cleanup around the space needed for cooling, rather than using storage as a way to clear the counter quickly.
2. Remove loose debris first
Once routine cleaning is safe, lift away crumbs and loose food gently. This prevents you from rubbing particles around the glass while wiping. Check the counter underneath too, but only move the cooled, unplugged appliance in the way its instructions allow.
In a tiny kitchen, the bottom of the unit can pick up debris from the same counter used for chopping. Cleaning the worktop before putting the burner back is an easy part of the routine to overlook.
3. Clean without adding unnecessary moisture
Use the method in your manual. If it permits a damp cloth, wring the cloth well and wipe carefully. If it specifies a cooktop cleaner, follow both the appliance instructions and the cleaner’s directions. Do not spray toward ventilation openings, the power inlet, or gaps around controls.
More product is not automatically better. An excessive amount takes longer to remove and can spread beyond the glass. Work on the affected area rather than covering the whole housing with cleaning fluid.
4. Remove residue and dry
Finish with the prescribed residue-removal step and a clean, dry cloth where appropriate. Look across the glass from an angle to spot streaks you missed. Before reconnecting, confirm the exterior and electrical connections are dry and the cooking surface has no remaining cleaner that the instructions require you to remove.
How to handle grease and stuck-on food
For an oily film, start with the approved routine method and a fresh cloth. A grease-loaded cloth can redistribute the film instead of removing it. Change cloths before deciding that you need a stronger chemical.
For cooled, stuck-on food, use only the residue-removal process allowed for your model. Do not reach for a kitchen knife, loose razor blade, screwdriver, or abrasive dish pad. If a scraper is approved, use the specified tool and technique; permission to scrape the glass is not permission to scrape controls, trim, or the housing.
Stop when the mark is no longer clearly removable food. A scratch, chip, worn marking, or damaged coating will not improve through increasingly forceful scrubbing. Photograph the area and ask the manufacturer if you cannot tell whether it is residue or damage.
Sugar and melted plastic need a separate decision
Do not apply a universal “wait until everything cools” rule to hot syrup, jam, candy, or melted plastic. GE’s glass-cooktop cleaning guidance warns that these spills can damage the glass and provides a special hot-spill procedure with hand protection and an appropriate scraper. That guidance concerns GE appliances; it does not establish the approved procedure for every portable induction burner.
For your unit, switch cooking off and consult its specific spill instructions. Do not touch hot residue or improvise with an unapproved blade. If you cannot safely follow the prescribed method, contact the manufacturer for advice. Keep children and pets away while dealing with the spill.
After removal, examine the surface before using the burner again. If glass is chipped, pitted, or cracked, stop and obtain service guidance. Cleaning cannot restore missing glass. Preventing these spills is especially valuable when a portable burner sits close to plastic packaging or a utensil tray.
What about white marks, streaks, and scratches?
Start by asking what changed. Did water boil over? Was a different cleaner used? Did a pan move across the surface? This is more useful than treating every visible mark as burned food.
For streaks, check whether cleaner remains and whether the finishing cloth is clean. For stubborn discoloration, consult your model’s troubleshooting or care section before trying vinegar, baking soda, polishing compounds, or a stronger cleaner. Popular household mixtures are not automatically suitable for your finish.
Do not try to polish a scratch out with abrasive compounds. If the glass has a crack or chip, discontinue use and seek the manufacturer’s instructions. If the surface appears intact but a mark persists, a clear photo and model number will help support identify the next step.
Keep vents clean without opening the appliance
The underside and sides deserve attention, but they are not washable cookware. Check accessible ventilation openings for external dust when the appliance is cooled and unplugged. Follow the manual for removing that dust; never insert a wet cloth or a tool inside.
Do not remove the base to clean the fan, spray cleaner through the vent, or assume blowing debris deeper into the unit is helpful. Internal cleaning and repairs belong with the manufacturer or an appropriate service provider.
If the fan sounds different after a spill, the burner shows an error, or you suspect liquid entered the housing, do not keep testing it to see whether it improves. Our guide to normal induction sounds and warning signs helps distinguish everyday noise from a reason to stop using the appliance.
A realistic routine for a small kitchen
After each use: handle any special spill according to the manual, then complete routine cleaning once safe. Clean the pan’s underside separately so yesterday’s residue does not return to the glass tomorrow.
During your regular kitchen cleanup: inspect the cooled, unplugged cooktop’s exterior, cord, and accessible vents. Clean the counter where it stands and make sure storage has not introduced dust, crumbs, or dampness. There is no universal weekly maintenance requirement; adjust inspection to how often you cook and the manufacturer’s instructions.
Before storage: allow cooling and drying to finish. Store the appliance as directed, without heavy objects pressing on the glass or a sharply bent cord. Keep the manual accessible on your phone so spill instructions are easy to find when you need them.
A useful space-saving habit is to prepare a separate landing area for hot cookware before cooking begins. You then have somewhere safe for the pan without placing it on packaging, balancing it over the sink, or crowding the cooktop controls.
Prevent the next difficult cleanup
- Use a pan large enough for the meal, leaving room for bubbling liquid.
- Reduce cooking power when the recipe allows, rather than letting a full pot boil aggressively.
- Lift cookware instead of sliding it, and inspect the base for rough spots.
- Keep plastic bags, food packaging, and cleaning supplies away from hot cookware.
- Do not place a protective mat, foil, towel, or liner under the pan unless the cooktop manufacturer explicitly permits that exact use.
If your pan is unstable or poorly matched to the burner, cleaning is only part of the problem. See what cookware works on a portable induction cooktop before replacing supplies or changing cooking habits.
Frequently asked questions
Can I wash a portable induction cooktop in the sink?
No. Treat it as an electrical appliance, not a removable cooking pan. Do not immerse the unit or rinse it under running water. Follow its exterior-cleaning instructions.
Can I use ordinary dish soap?
Only if your model’s manual permits that method on the relevant surface. Do not assume a method approved for the housing is also approved for the glass or control panel. Use minimal moisture and finish as directed.
Can I clean it immediately after cooking?
Not with the ordinary routine while the glass remains hot. Special spills may have different instructions. Read those before cooking sugary foods, so you are not searching for a safe procedure during a spill.
Is a glass-cooktop scraper always safe?
No. Use one only when the manufacturer approves it, on the permitted surface, following its directions. A scraper sold for cooktops is not universal authorization to use it on your appliance.
Should I replace a cooktop that stays stained?
A cosmetic mark alone is not enough to decide. Ask support about persistent residue or discoloration. Cracked glass, liquid ingress, or damaged electrical parts require stopping use and obtaining advice, not simply buying a stronger cleaner.
Bottom line: gentle, model-specific care wins
The best cleaning routine is simple enough to repeat: safe shutdown, approved glass cleaning, controlled moisture, dry electrical parts, and a brief inspection. Save special spill instructions before you need them, and avoid escalating from a stubborn mark to an unapproved tool.
If you need a replacement rather than a cleaning product, start with our portable induction cooktop guide for small apartments. You can also read our guide to the best compact induction cooktops; check the model’s manual, dimensions, and care requirements before choosing.
Illustrative cooktop photo by Henry Kobutra on Unsplash.
Featured photo by Kelly Sikkema on Unsplash.
Pingback: Portable Induction Cooktop Keeps Shutting Off? Safe Checks